Key Highlights:
- The Hogwarts Legacy bridge puzzle requires four braziers to be lit and set to the correct Roman numerals.
- Facing the bridge from the engraved floor plate, set the left braziers to IV and I, and the right braziers to II and III.
- Solving the puzzle reveals two Collection Chests and a Legendary gear chest, and counts towards the Hogwarts Secrets challenge.
Quick Links:
The Hogwarts Legacy bridge puzzle in Viaduct Courtyard is solved by lighting four braziers and matching their Roman numerals to the symbols engraved on the bridge. Once all four are correct, a hidden hatch opens, revealing three treasure chests beneath the bridge.
The puzzle is one of three Hogwarts Secrets found around the castle, making it worthwhile for players working towards full completion.
Where to Find the Viaduct Courtyard Bridge Puzzle
Open the Hogwarts map and fast travel to the Viaduct Courtyard Floo Flame in the Great Hall section.
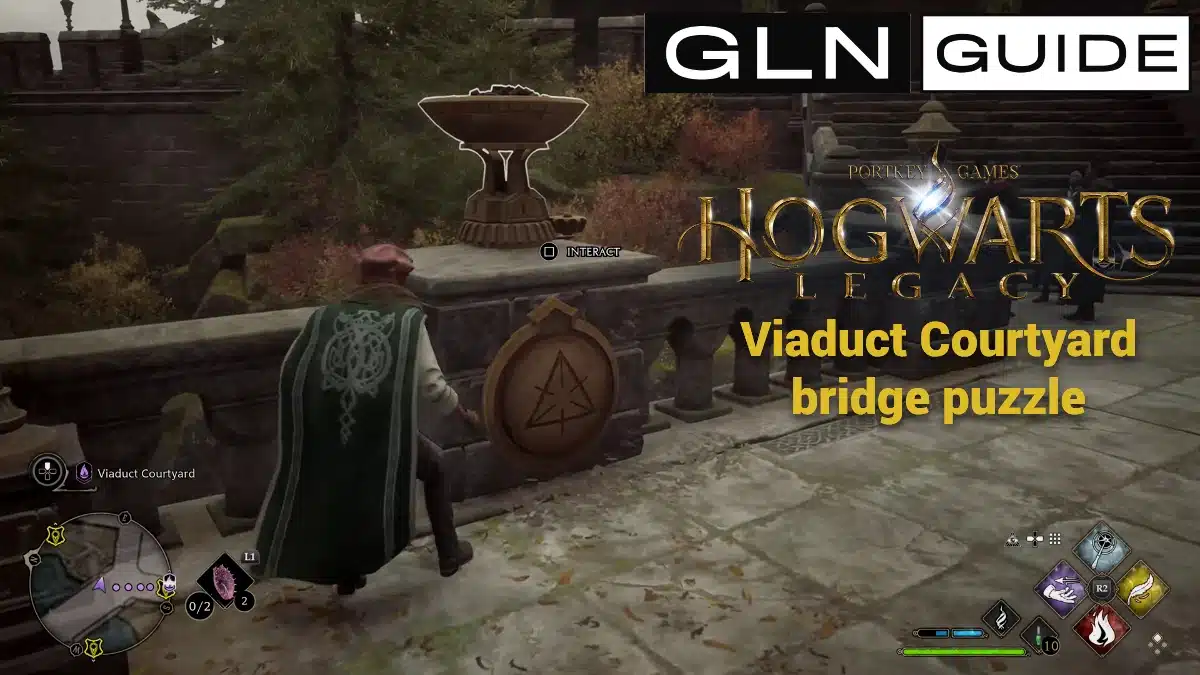
Head towards the large stone bridge connecting the Great Hall area to the Library Annex. You will find four braziers along its railings, with two on either side.
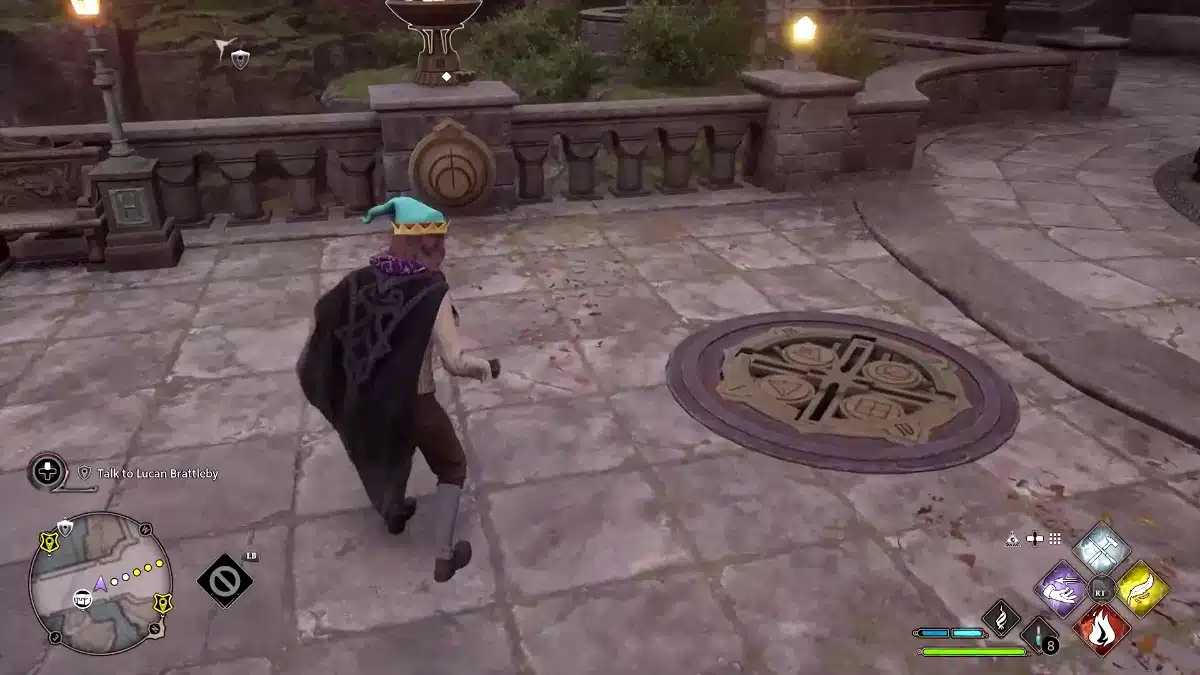
An engraved circular plate in the bridge floor provides the solution. It displays four symbols, each associated with a Roman numeral.
You will need a fire spell to activate the braziers. Incendio works, although Confringo is particularly convenient because you can ignite them from a distance.
How to Solve the Hogwarts Legacy Bridge Puzzle
Follow these steps to unlock the hidden chamber:
- Light all four braziers using Incendio or Confringo.
- Locate the circular floor plate engraved with four symbols and Roman numerals.
- Interact with each lit brazier to rotate its numbered mechanism.
- Match every brazier to the correct Roman numeral using the solution below.
- Return to the floor plate once all four are correct. The hatch will open, revealing a ladder leading beneath the bridge.
For the exact positions, stand on the engraved floor plate and look along the bridge.
| Brazier position | Correct numeral |
|---|---|
| Front left | IV |
| Back left | I |
| Front right | II |
| Back right | III |
Alternatively, you can match the symbols beneath the braziers to the markings on the floor plate.
| Symbol | Roman numeral |
|---|---|
| Triangle with several lines | I |
| Two overlapping circles with a line | II |
| Triangle with a circle | III |
| Diamond with an X | IV |
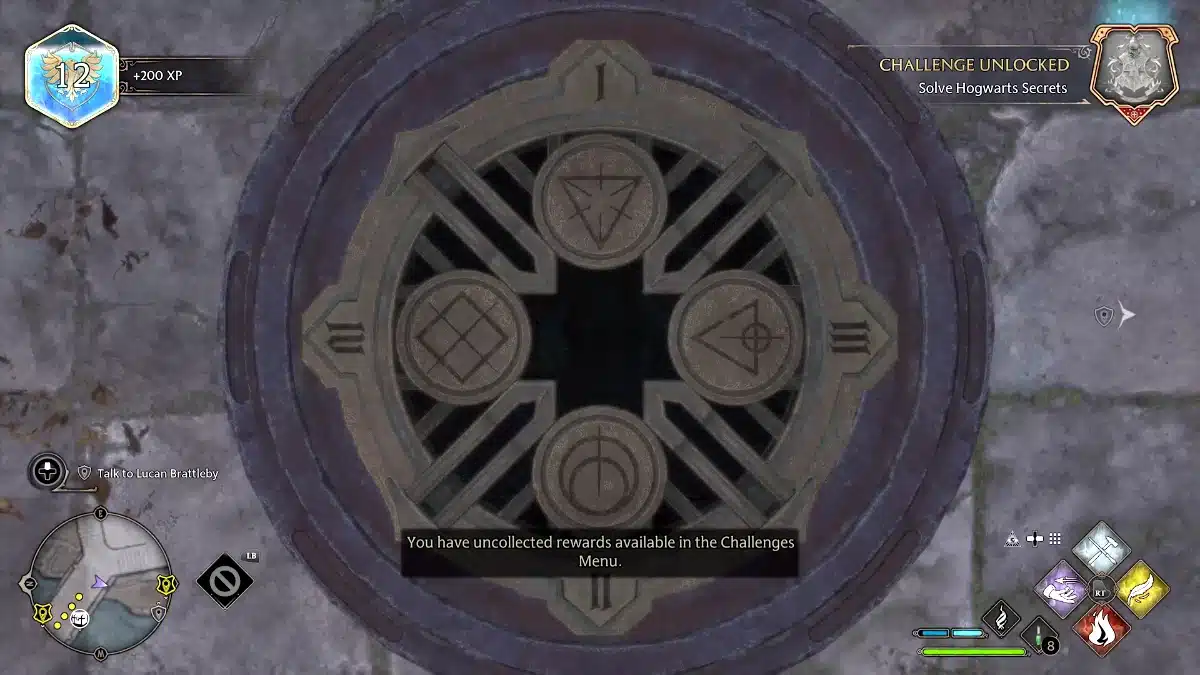
I recommend using the engraved symbols as the final check. Left and right positions can become confusing when approaching the bridge from the opposite direction, but the symbol-to-number combinations never change.
Important: If a brazier will not rotate, make sure you have ignited it first. You do not need Alohomora or any additional spell to open the hatch.
Viaduct Courtyard Bridge Puzzle Rewards
Once the floor hatch opens, climb down the ladder to reach the hidden area beneath the Viaduct Courtyard Bridge.
Inside, you can collect:
- Two Collection Chests, containing items for your collections.
- One Legendary gear chest, providing a piece of Legendary equipment.
The Legendary gear chest is particularly useful if you are preparing for more demanding encounters, including the waves of enemies covered in our Hogwarts Legacy battle arena tips.
Completing the bridge puzzle also contributes to the Solve Hogwarts Secrets challenge in the Field Guide. There are three Hogwarts Secrets in total, and progressing through the challenge unlocks cosmetic appearance rewards.
Viaduct Courtyard Bridge Puzzle Video Walkthrough
If you prefer to see the brazier positions and hidden entrance in action, our short video walkthrough demonstrates the Viaduct Courtyard bridge puzzle solution.