

Key Highlights:
- Complete guide covering Reiko’s Fatalities, Animality, and Brutalities in Mortal Kombat 1.
- Platform-specific inputs with Input Distance and Execution Difficulty ratings for Fatalities and Animality.
- Brutality requirements include Fighter Mastery ranks, Final Hit conditions, corrected move requirements, and Seasonal Store Brutalities. Features practical execution advice, platform controls, and video guide.
Quick Links:
Reiko serves as General Shao’s fiercely loyal lieutenant in Mortal Kombat 1, combining military discipline with wrestling-style throws, command grabs, tackles and projectile attacks. His offence centres heavily on close-range physical punishment through moves such as Pale Rider, Tactical Takedown, Retaliation and Charging Pain.
Reiko has two character-specific Fatalities, the Ram-page Animality, The Klassic, five Brutalities unlocked through Fighter Mastery and two additional Khaos Reigns-era Brutalities. This Mortal Kombat 1 guide covers every current finisher alongside its platform inputs, working distances, Final Hits and activation conditions.
How to Perform Reiko’s First Fatality in MK1 (The Impaler)
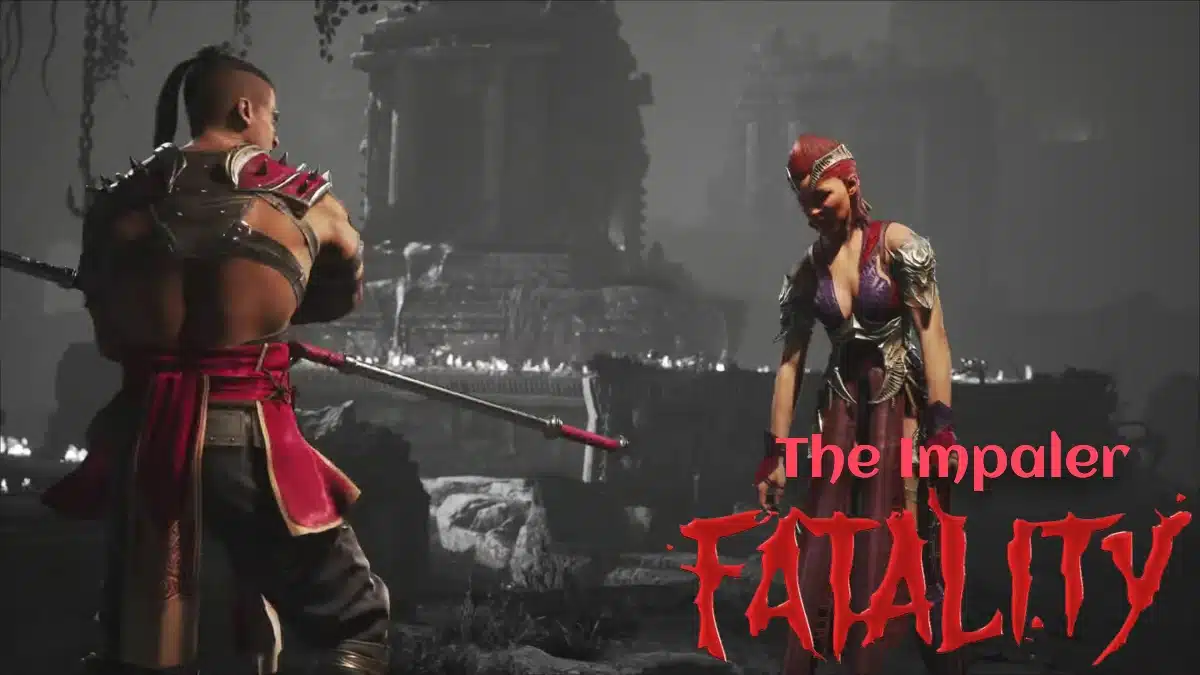
Input Distance: Jump Distance
Execution Difficulty: Easy
- PlayStation: ⬇️⬇️⬅️🔺
- Xbox: ⬇️⬇️⬅️🅨
- Nintendo Switch: ⬇️⬇️⬅️🅧
Reiko spins his spear through the opponent’s limbs before driving the weapon through their abdomen. He plants the spear into the ground and tears down through the victim’s exposed torso, forcing the weapon through their mouth.
The Impaler is commonly described simply as a Mid Fatality, but the more useful positioning is Jump Distance.
I would establish the gap before entering the input rather than trying to judge a vague Mid position. Once Reiko is around one full jump away, the four-button sequence is straightforward.
How to Perform Reiko’s Second Fatality in MK1 (Pinned Down)
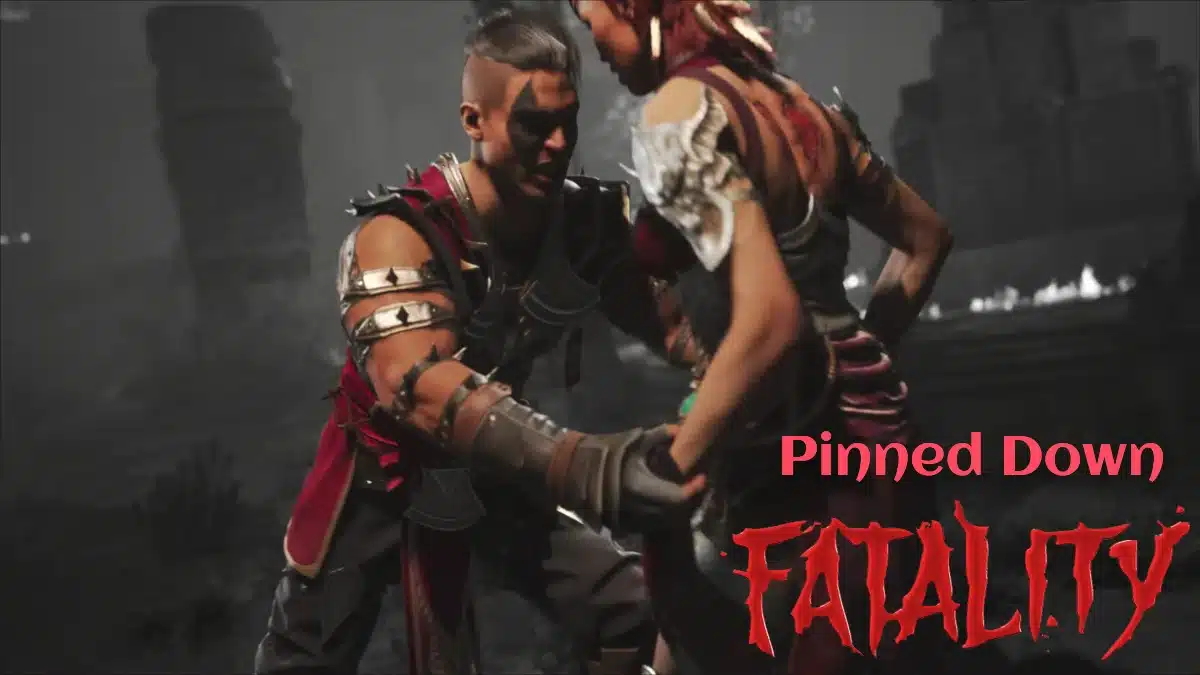
Input Distance: Close to Sweep Distance
Execution Difficulty: Easy
- PlayStation: ⬅️⬇️⬇️🅾️
- Xbox: ⬅️⬇️⬇️🅑
- Nintendo Switch: ⬅️⬇️⬇️🅐
Pinned Down sees Reiko break both of his opponent’s arms and force the exposed bones through their jaw. He twists the upper body before reaching through the abdomen and tearing out the spine and pelvis.
The Fatality allows considerably more positioning freedom than the traditional Close label suggests. Reiko does not need to stand directly against the opponent, which makes it easier to perform after a round finishes with a small gap between both fighters.
Of Reiko’s two Fatalities, I would use Pinned Down when the opponent falls nearby and The Impaler when the final exchange creates noticeably more distance.
Important: Reiko can also perform the Halloween, Thanksgiving, and Winter Fatalities if they are unlocked on the player’s account. These seasonal Fatalities are not unique to Reiko and can be performed by other playable fighters.
How to Perform Reiko’s Animality in MK1 (Ram-page)
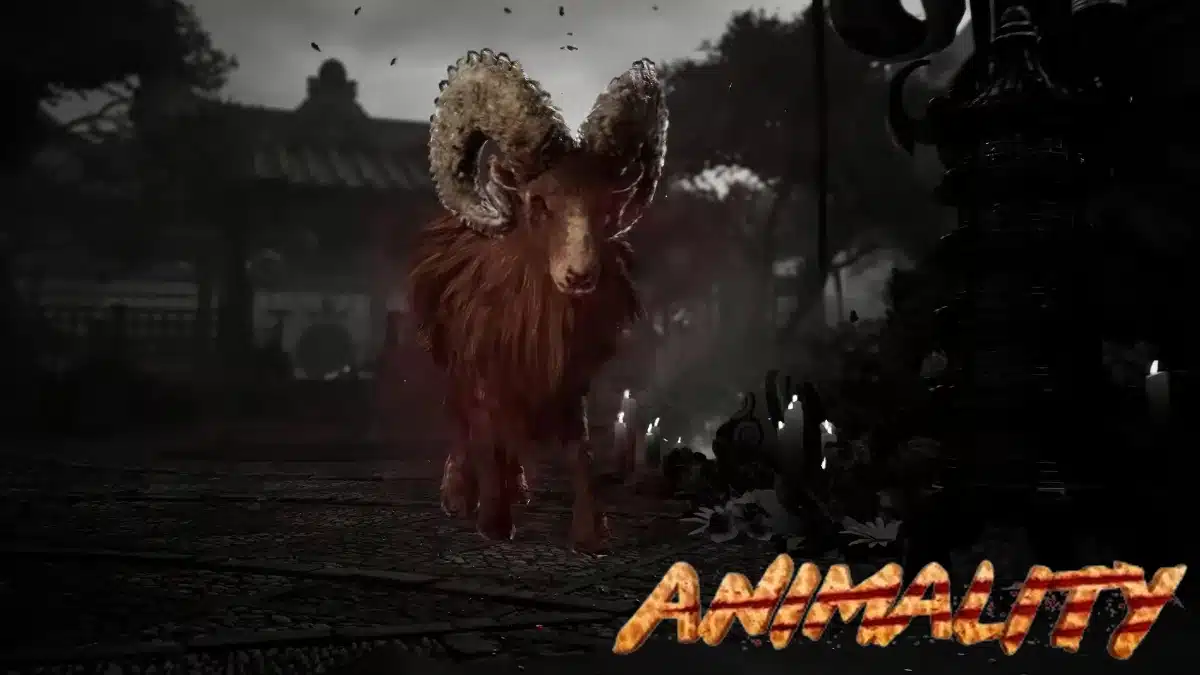
Input Distance: Sweep Distance to Full Screen
Execution Difficulty: Easy
- PlayStation: ➡️⬇️⬇️⬜
- Xbox: ➡️⬇️⬇️🅧
- Nintendo Switch: ➡️⬇️⬇️🅨
Ram-page transforms Reiko into a huge ram with curved horns. He knocks the opponent backwards with the first charge before launching himself forwards again and tearing straight through their body.
Its generous range makes Ram-page particularly useful when the winning attack leaves the opponent on the other side of the arena. There is no reason to walk Reiko back towards them once the required minimum spacing has been established.
Ram-page is Reiko’s first Animality in the Mortal Kombat series. Reiko debuted in Mortal Kombat 4, after the original Animality system had disappeared from the main games, so Mortal Kombat 1 marks his first animal transformation.
For the animal transformation used by every other playable fighter, see our complete Mortal Kombat 1 Animality guide.
All Reiko Brutalities in Mortal Kombat 1
Reiko has The Klassic and five character-specific Brutalities unlocked through Fighter Mastery. No Turning Back, You Had Enough?, Does It Sting, Not Even Close and There And Back Again unlock at Mastery Ranks 3, 5, 7, 10 and 15 respectively.
Two further Brutalities, Long Walk and Spear Head, were added later and sit outside Reiko’s original Fighter Mastery progression.
The Klassic
Unlock Requirement: Available by default
- PlayStation: ⬇️ + 🔺
- Xbox: ⬇️ + 🅨
- Nintendo Switch: ⬇️ + 🅧
Final Hit: Uppercut
Additional Condition: Hold Back Punch during the Final Hit.
Reiko performs the universal Uppercut Brutality and removes the opponent’s head.
The Klassic requires no Fighter Mastery progression. Continue holding Back Punch after entering the Uppercut so the condition is already active when the Final Hit connects.
No Turning Back
Unlock Requirement: Fighter Mastery Rank 3
- PlayStation: L1 or ⬜ + 🅧
- Xbox: LB or 🅧 + 🅐
- Nintendo Switch: L or 🅨 + 🅑
Final Hit: Military Might (Back Throw)
Additional Condition: Rapidly press Back Kick four times during the Throw.
Reiko begins his Back Throw before violently kicking through the opponent and dismembering their upper body.
The practical part is getting the four Back Kick presses registered during the Throw rather than waiting for the animation to approach its ending.
I would begin pressing Back Kick immediately after Military Might starts and continue until the Brutality triggers. That removes the need to judge a specific visual cue late in the Throw.
Brutality Variation: Instead of rapidly pressing Back Kick, hold Up + Back Punch immediately after initiating the Back Throw to trigger the universal MK11-style Screen Throw Brutality. The opponent is thrown towards the camera and cracks the screen.
Both finishers therefore share the same starting Throw. The follow-up input determines which Brutality Reiko performs.
You Had Enough?
Unlock Requirement: Fighter Mastery Rank 5
- PlayStation: ⬅️⬇️➡️⬜
- Xbox: ⬅️⬇️➡️🅧
- Nintendo Switch: ⬅️⬇️➡️🅨
Final Hit: Pale Rider
Additional Condition: Hold Down during the Final Hit.
Reiko grabs the opponent with Pale Rider and converts the command grab into a lethal finishing sequence.
The current Brutality uses Pale Rider, not Tactical Takedown. Enter Back, Down, Forward + Front Punch and begin holding Down once the command grab has started.
NOTE: Many older Reiko Brutality lists give Tactical Takedown here. That information is outdated. Pale Rider is the current Final Hit requirement.
This correction matters because the two specials use completely different inputs. Following an old DB3 instruction will never produce the current You Had Enough? Brutality.
Does It Sting
Unlock Requirement: Fighter Mastery Rank 7
- PlayStation: ⬇️⬅️🅧
- Xbox: ⬇️⬅️🅐
- Nintendo Switch: ⬇️⬅️🅑
Final Hit: Tactical Takedown
Additional Condition: Press Down, Down, Down during the hit.
Reiko performs Tactical Takedown, slams the opponent onto the ground and continues the attack until their head is destroyed.
Does It Sting is much more reliable when the three Down inputs are entered early in Tactical Takedown rather than saved for the end of the ground attack.
I would perform Down, Back + Front Kick and immediately transition into:
Down → Down → Down
That separates the Brutality into the special-move input first and its activation condition second.
NOTE: Older documents frequently associate the name Does It Sting with Retaliation. The current Brutality uses Tactical Takedown.
Not Even Close
Unlock Requirement: Fighter Mastery Rank 10
- PlayStation: ⬇️⬅️⬜
- Xbox: ⬇️⬅️🅧
- Nintendo Switch: ⬇️⬅️🅨
Final Hit: Retaliation
Additional Condition: Hold Front Punch during the counterattack.
Not Even Close is Reiko’s parry Brutality. Retaliation must successfully intercept an opponent’s grounded High, Mid or Overhead attack, with the resulting counterattack delivering the Final Hit.
That makes the setup fundamentally different from Reiko’s other Brutalities because the opponent has to attack into Retaliation.
I would reduce the opponent to extremely low health first, create enough space for them to attempt a normal attack, then enter Down, Back + Front Punch and keep Front Punch held once the parry catches them.
Trying to use Retaliation against a Low attack will not create the required counter.
There And Back Again
Unlock Requirement: Fighter Mastery Rank 15
- PlayStation: ⬜, 🔺, 🅧
- Xbox: 🅧, 🅨, 🅐
- Nintendo Switch: 🅨, 🅧, 🅑
Final Hit: Krude Kompany
Additional Condition: Hold Forward during the Final Hit.
Reiko completes Krude Kompany and uses its finishing kick to tear the opponent apart.
The important execution detail is when Forward is introduced. Holding Forward before beginning the Kombo can change the opening Front Punch into a directional normal and prevent Krude Kompany from coming out correctly.
I would enter it as:
Front Punch → Back Punch → hold Forward → Front Kick
That preserves the original Kombo while giving the held direction enough time to register before the Final Hit.
Seasonal Store Brutalities
Reiko received two additional Brutalities during the Khaos Reigns era. Long Walk and Spear Head are separate from Fighter Mastery progression and remain usable once acquired.
Long Walk
Unlock Requirement: Seasonal Store
- PlayStation: ⬅️➡️🅧
- Xbox: ⬅️➡️🅐
- Nintendo Switch: ⬅️➡️🅑
Final Hit: Charging Pain
Additional Condition: Hold Down during the Final Hit.
Reiko performs Charging Pain and destroys the opponent’s lower legs, leaving them desperately crawling across the arena before finally bleeding out.
Long Walk requires the standard Charging Pain rather than one of Reiko’s follow-up variations. Enter Back, Forward + Front Kick and begin holding Down as the sliding attack connects.
I would avoid adding any other directional input after Charging Pain begins. Reiko can modify the special into different follow-ups, so keeping the sequence simple prevents another move from replacing the required Final Hit.
Spear Head
Unlock Requirement: Seasonal Store
- PlayStation: 🅧, 🅾️
- Xbox: 🅐, 🅑
- Nintendo Switch: 🅑, 🅐
Final Hit: Kollateral Damage
Additional Condition: Hold Down during the Final Hit.
Reiko completes Kollateral Damage and knocks the opponent to the floor. As they attempt to crawl away, he produces his spear and drives it down through their head.
Spear Head has one of Reiko’s simplest activation conditions. Perform Front Kick, Back Kick and begin holding Down before the second attack completes.
There is no meter, distance, charge or counter requirement to manage.
Reiko Fatalities, Animality, and Brutalities Video Guide

Ben-Gun’s video showcases both of Reiko’s character-specific Fatalities in Mortal Kombat 1, The Impaler and Pinned Down. It provides a clear look at each complete finishing sequence, making it a useful visual companion to the inputs and positioning covered above.
In Mortal Kombat 1’s New Era, Reiko’s defining relationship is his absolute loyalty to General Shao, serving as his second-in-command and fighting alongside him against Outworld’s royal authority. You can explore our General Shao finisher guide for his Fatalities, Animality, and Brutalities.
For the complete playable roster in one place, see our Mortal Kombat 1 Finisher Guide, which brings together every character guide covering Fatalities, Animalities and Brutalities.